Grilling is more than just a way to cook food. It’s an art form that elevates the outdoor cooking experience to new heights. The pursuit of perfect grill marks is at the core of this culinary art. It serves not just an aesthetic purpose but also enhances the dish’s flavor. These charred lines seal in juices and impart a smoky taste. This taste can transform a simple piece of meat into a mouthwatering masterpiece. For those passionate about grilling, learning “How to Create Perfect Grill Marks Every Time” is a crucial skill. This skill can set your dishes apart.
Achieving these coveted grill marks is not just about technique; it’s about understanding the science behind grilling. Whether you’re grilling steak, chicken, or even vegetables, the principles remain the same. This article will guide you through essential steps and tips. It ensures that every time you fire up the grill, you’re equipped to produce beautifully marked and deliciously flavored dishes. Let’s dive into the techniques. These techniques will help you master the art of perfect grill marks. They enhance both the presentation and taste of your culinary creations.

The Importance of Grill Marks – How to Create Perfect Grill Marks
When it comes to grilling, the visual appeal of your dish plays a significant role in the overall dining experience. However, the importance of grill marks transcends far beyond just aesthetics.
These charred lines are a testament to a griller’s skill. They offer not only eye-catching appeal but also a feast for the taste buds. Achieving perfect grill marks every time signifies mastery over the grill. The reasons for striving for these marks are deeply rooted in the culinary benefits they provide.
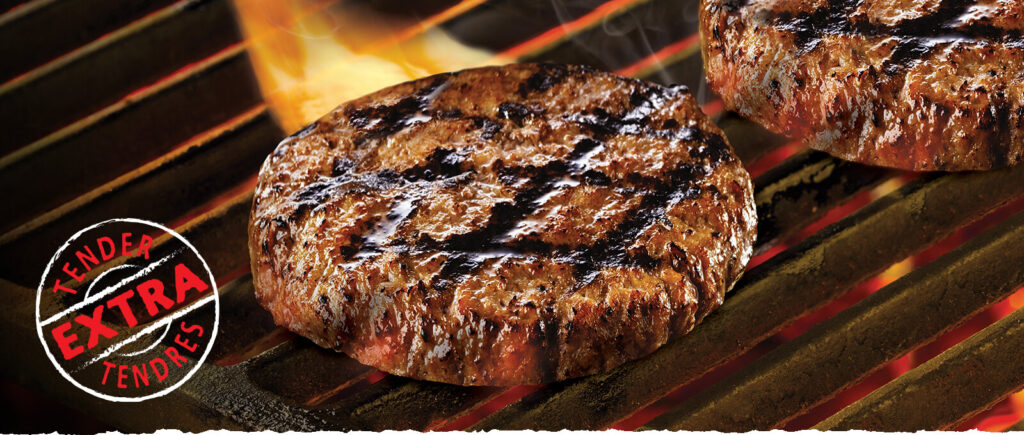
Firstly, grill marks are crucial for sealing in the flavors. The high heat required to create these marks quickly sears the surface of the meat, trapping the juices inside. This process ensures that the meat remains succulent and tender, bursting with its natural flavors with every bite. Moreover, the Maillard reaction, a chemical reaction between amino acids and reducing sugars that gives browned food its distinctive flavor, is epitomized in the form of grill marks. This reaction not only contributes to the complex flavors of grilled foods but also adds a hint of smokiness that is highly sought after in grilled dishes.
Furthermore, grill marks create a delightful texture contrast that enhances the eating experience. The crispy, charred lines against the soft, juicy interior of the meat offer a combination of textures that is both pleasing to the palate and the eye. This contrast is not just limited to meats; vegetables and even some fruits can benefit from the textural complexity that grill marks provide, transforming a simple grilled dish into a gourmet experience.

Choosing the Right Grill
The quest to create perfect grill marks every time begins with selecting the appropriate grill. The type of grill you use plays a pivotal role in not only the flavor of your food but also in the quality and appearance of those coveted grill marks. Let’s explore the primary types of grills available—gas, charcoal, and pellet—and understand which ones best facilitate the creation of perfect grill marks.
Gas Grills
Gas grills are prized for their convenience and ease of use, offering precise temperature control at the turn of a knob. This control allows for consistent heat, which is essential for creating uniform grill marks. While gas grills can certainly achieve beautiful grill marks, aficionados might argue that they lack the authentic smoky flavor imparted by charcoal or pellet grills.
Charcoal Grills
Charcoal grills are the choice of purists who covet the traditional smoky flavor and high heat these grills can generate. The intense heat and the ability to create direct and indirect cooking zones make charcoal grills excellent for searing meats and creating distinct, deep grill marks. The variable temperature control requires more attention and experience but offers a rewarding depth of flavor and aesthetic appeal.
Pellet Grills
Pellet grills combine the ease of use found in gas grills with the smoky flavor characteristic of charcoal grills. They use wood pellets and electronic control to maintain a steady temperature, which can be ideal for slow cooking and smoking. However, achieving high temperatures for quick searing and pronounced grill marks can be more challenging with some pellet grill models.
Tips on Maintaining the Right Temperature for Grilling:
- Preheat Your Grill: Whether you’re using gas, charcoal, or a pellet grill, preheating is crucial. A hot grill ensures that your meat starts searing upon contact, creating those perfect grill marks. For gas and pellet grills, preheat to a high temperature before reducing it to cook. With charcoal, let the coals ash over and distribute them evenly to create a hot zone for searing.
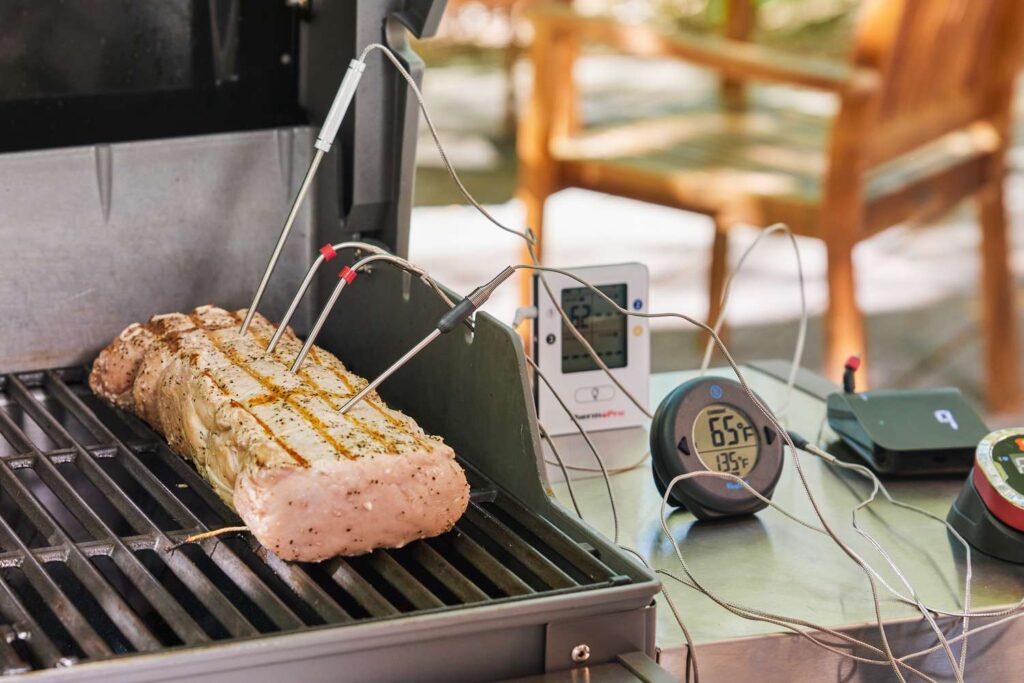
- Use a Grill Thermometer: Not all grills come with an accurate built-in thermometer. Investing in a reliable grill thermometer can help you maintain the right temperature for creating perfect grill marks.
- Clean Grill Grates Before Cooking: Residue from previous grilling sessions can interfere with heat transfer and may prevent the formation of uniform grill marks. Ensure your grill grates are clean and lightly oiled before you start grilling.
- Don’t Overcrowd the Grill: Placing too many items on the grill at once can lower the surface temperature of the grates, making it harder to achieve those perfect marks. Grill in batches if necessary to ensure each piece has enough space and heat to sear properly.
In summary, choosing the right grill and maintaining the correct temperature are foundational steps in achieving perfect grill marks. While gas grills offer convenience and consistency, charcoal grills provide high heat and flavor, with pellet grills offering a middle ground between the two. Understanding the strengths and limitations of each grill type, coupled with temperature management, sets the stage for grilling success.

Preparing Your Meat for Grilling – How to Create Perfect Grill Marks
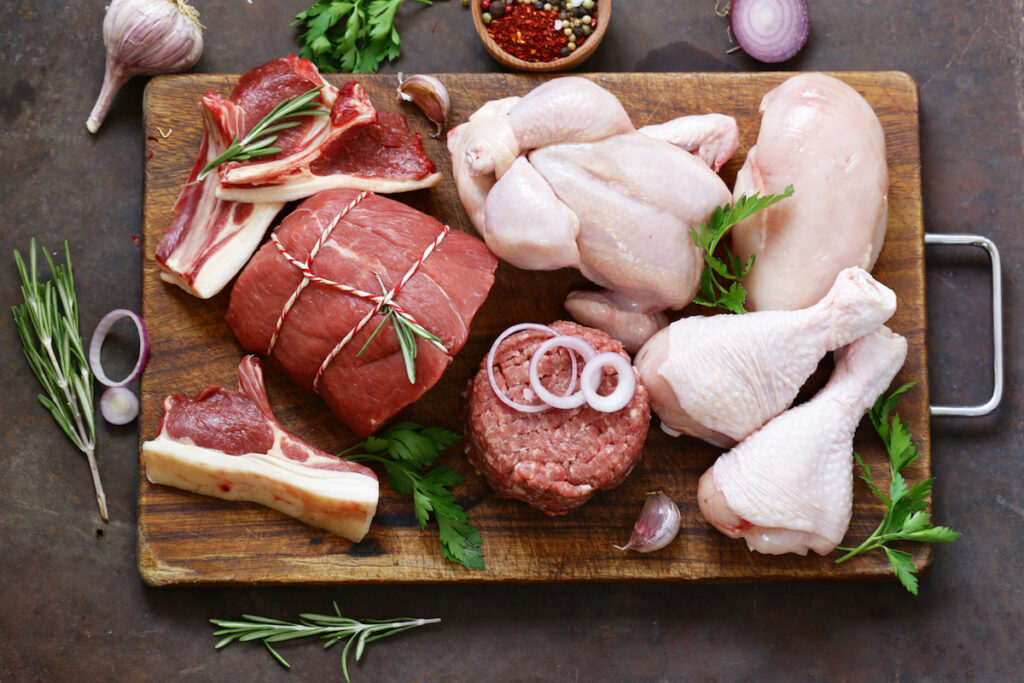
Before you can showcase those perfect grill marks to your guests, the preparation of the meat plays an essential role in the grilling process. Whether it’s a succulent steak, tender chicken, or delicate fish, the initial steps before it hits the grill can make all the difference in flavor and appearance.
Steak
Begin by taking your steak out of the refrigerator to allow it to come to room temperature for about 20 to 30 minutes. This step ensures that your steak cooks evenly. Before grilling, pat the steak dry with paper towels to remove any excess moisture that could steam the meat instead of searing it. Season generously with salt and pepper or your choice of spices. Finally, brush a light coat of high-smoke-point oil on both sides to promote beautiful grill marks and prevent sticking.
Chicken
Similar to steak, start by bringing your chicken to room temperature. Patting the chicken dry is crucial for skin-on cuts to achieve a crispy exterior. Season as desired, and apply a thin layer of oil. For chicken, especially pieces with skin, ensuring the skin is as dry as possible before oiling and seasoning will greatly enhance the texture and grill mark clarity.
Fish
Fish requires a delicate touch due to its more fragile nature. Pat the fish dry and then apply a thin layer of oil directly to the fish rather than the grill grates. This method helps prevent sticking and falling apart. Seasoning should be light to complement its natural flavors. For fish, consider using a grill basket if you’re concerned about it sticking or breaking apart on the grill grates.
Importance of Patting the Meat Dry and Using Oil: Moisture is the enemy of searing. Excess surface moisture turns to steam at high heat, preventing the Maillard reaction that contributes to the formation of those sought-after grill marks. Patting the meat dry and then applying a thin layer of oil does two things: it removes moisture for better searing and creates a non-stick surface that enhances the grill marks’ contrast and definition.

Technique: Mastering the Grill Marks
Achieving those coveted, picture-perfect grill marks on your meats is not just a matter of aesthetic appeal but also a testament to your grilling prowess. Here’s a detailed guide on how to create perfect grill marks, tailored to different types of meats.
Perfect Grill Marks on Steak
- Preheat the Grill: Start by heating your grill to high. For gas grills, this means all burners on maximum. For charcoal grills, amass a hot bed of coals. The goal is to reach a surface temperature of about 450°F to 500°F, ideal for searing.
- Position the Steak: Place your steak on the grill at a 45-degree angle to the grates. This positioning is crucial for achieving the classic diamond grill marks.
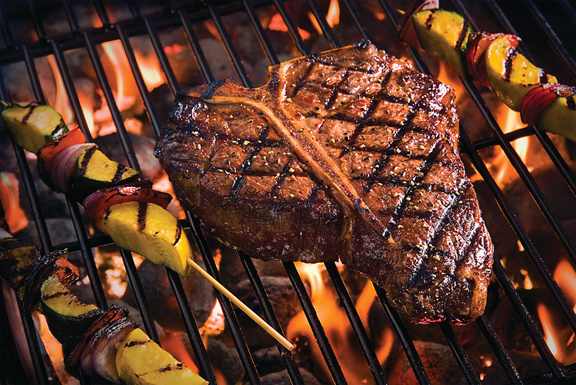
- Sear and Rotate: Sear the steak for about 2 to 3 minutes. Then, using tongs, rotate it 90 degrees (without flipping) and sear for another 2 to 3 minutes. This rotation creates the crosshatch pattern.
- Flip and Repeat: Flip the steak over, moving it to a slightly different part of the grill (to ensure a hot surface) and repeat the searing and rotating steps on the other side.
Perfect Grill Marks on Chicken
- Lower the Heat: Chicken requires a bit more finesse due to its varying thickness and the need to cook thoroughly. Preheat your grill to a medium-high setting, aiming for a surface temperature around 400°F.
- Skin-Side Down First: Place your chicken skin-side down, at a 45-degree angle to the grill grates. The skin will protect the meat from direct heat while allowing it to crisp up.
- Sear and Rotate: After about 5 minutes, rotate the chicken 90 degrees to create the crosshatch marks. Be gentle to avoid tearing the skin.
- Flip and Monitor: Flip the chicken over, reduce the heat (or move to a cooler part of the grill), and continue cooking until it reaches the safe internal temperature of 165°F, rotating once midway to complete the grill marks.
Grill Marks on Fish
- Preparation is Key: Given its delicate texture, ensure your grill grates are clean and well-oiled. Preheat the grill to a medium setting, around 375°F to 400°F.
- Non-Stick Preparation: Apply a thin layer of oil to both sides of the fish. This prevents sticking and helps in transferring the fish.
- Gentle Placement: Lay the fish down at a 45-degree angle to the grates, gently pressing down to ensure good contact with the grill.
- Sear and Flip Carefully: After 2-3 minutes, gently lift and rotate the fish 90 degrees. Grill for another 2-3 minutes before flipping. Use a spatula for support to avoid breaking the fish.

The Role of Heat and Timing to get perfect Grill Marks
Understanding and managing grill temperature and cooking time is pivotal in the art of creating perfect grill marks. These elements not only influence the appearance of your meats but also affect their flavor and juiciness. Here are some insights and tips on how to master heat management and timing on both gas and charcoal grills, ensuring every piece of meat you grill is a testament to your skill.
Heat Management
- Gas Grills: Gas grills offer the convenience of easily adjustable heat settings. For perfect grill marks, preheat your grill on high to get the grates hot enough to sear. Once you place your meat on the grill, you may need to adjust the heat down slightly to avoid burning. The key is to find a balance that sears the meat quickly without overcooking it. Use the knobs to adjust the flame and create a direct high heat for searing and a lower heat zone where the meat can finish cooking through after searing.
- Charcoal Grills: Charcoal grills require a bit more finesse for heat management. Start with a hot coal bed and use vents to control the airflow, which in turn controls the heat. Open vents mean hotter flames, while closed vents will cool things down. For grill marks, spread the coals evenly under the area where you’ll place the meat to ensure a consistent high heat. After searing, you might move the meat to a cooler part of the grill (with fewer coals) to finish cooking.
Timing is Everything
The difference between perfect grill marks and burned meat often comes down to timing. Here are some general guidelines:
- Searing Time: Depending on the thickness, most meats require about 2 to 3 minutes per side to develop deep, flavorful grill marks. Be ready to adjust this based on the meat’s thickness and the grill’s actual temperature.
- Resting Meat: After grilling, let your meat rest for a few minutes before cutting into it. This allows the juices to redistribute, ensuring that your meat is moist and flavorful throughout.
- Checking for Doneness: Use a meat thermometer to ensure your meat has reached the desired internal temperature. This helps prevent overcooking, which is crucial for meats where timing is tight, like steaks and fish.
Adjusting Heat on the Fly
- For both grill types, learning to adjust the heat while cooking is essential. On gas grills, this may mean toggling the burners from high to medium. On charcoal grills, shifting the meat to zones with more or less charcoal underneath does the trick. Additionally, the lid can be a powerful tool in heat management—closing it can increase the ambient temperature around the meat, simulating an oven effect for more even cooking.
By paying close attention to heat and timing, you’ll not only achieve those visually appealing grill marks but also ensure your meats are cooked to perfection, both inside and out. Remember, grilling is as much about patience and practice as it is about heat and timing. With each grilling session, you’ll refine your skills, leading to consistently better results and, of course, perfect grill marks every time.

Flipping and Rotating Your Meat – How to Create Perfect Grill Marks
Mastering the technique of flipping and rotating meat on the grill is essential for achieving those coveted crosshatch grill marks that signify a well-grilled piece of meat. This not only adds to the visual appeal but also contributes to a more even cook and enhanced flavor. Here’s how you can perfect this technique:
The Basics of Flipping
- Single Flip Rule: A common best practice in grilling is to flip your meat only once. This allows one side to fully develop those deep, caramelized grill marks before the other side is cooked. Place your meat on the hot grill and let it sear undisturbed for the right amount of time before flipping it to the other side.
Creating the Crosshatch Pattern
- First Placement: Position your meat on the grill at a 45-degree angle to the grates. This angle is crucial for creating the desired crosshatch marks.
- First Rotation: After searing the meat for a few minutes (typically 2-3 minutes for steaks, depending on thickness and desired doneness), rotate it 90 degrees on the same side. This rotation is what creates the crosshatch pattern. Ensure the meat is still at a 45-degree angle but in the opposite direction to the initial grill marks.
- The Flip: Once you’ve achieved grill marks on one side and rotated the meat for the crosshatch pattern, it’s time to flip. Carefully lift the meat and flip it over to repeat the process on the other side. Start with the same 45-degree angle relative to the grill grates, and after a few minutes, rotate 90 degrees to complete the crosshatch pattern.
Timing and Attention
- Monitor Closely: The success of creating perfect grill marks through flipping and rotating relies heavily on timing and attention. Each type of meat and thickness requires different cooking times, so stay vigilant and adjust your timing accordingly.
- Use the Right Tools: A spatula or tongs that comfortably fit the size and shape of your meat cuts are vital. They will help you flip and rotate the meat with ease and precision, reducing the risk of tearing the meat or ruining the grill marks.

Finishing Touches
After mastering the art of creating perfect grill marks, the final step to ensure your grilled masterpiece is as flavorful as it is visually stunning involves a crucial resting period. Allowing the meat to rest before serving is not merely a suggestion; it’s an essential practice that ensures all those succulent juices redistribute throughout the meat, resulting in a tender and juicy experience with every bite.
Resting Your Meat
Once your meat has achieved those desirable grill marks and is cooked to perfection, remove it from the grill and let it rest on a warm plate or cutting board. This resting period should last about 5 to 10 minutes, depending on the size of the meat. For example, a thick steak or a large chicken breast benefits from a longer rest than thinner cuts. This patience pays off by preventing all the flavorful juices from running out the moment you cut into the meat, ensuring each piece is as juicy and flavorful as possible.
Serving Suggestions
To complement the visual appeal of your perfectly marked grill creations, consider the presentation on your plate. Pair your grilled meats with sides that enhance the main dish’s flavors and add color to the plate. Grilled vegetables, a fresh salad, or a complementary sauce can elevate your grilled dish from great to extraordinary. Remember, we eat with our eyes first; the presentation can make your already delicious meal even more appealing.

Conclusion – How to Create Perfect Grill Marks
Creating perfect grill marks is an art that elevates the grilling experience, transforming a simple barbecue into a culinary masterpiece. It’s not just about the visual appeal; those charred lines contribute to a richer flavor profile and texture, enhancing the overall dining experience. By following the guidelines outlined in this article, from choosing the right grill to mastering the technique and understanding the importance of heat and timing, you are well on your way to achieving those coveted marks.
Remember, the key to success lies in practice and patience. The phrase “How to Create Perfect Grill Marks Every Time” is not just a goal but a journey of culinary discovery and mastery. Each grill session is an opportunity to refine your skills, experiment with different meats, and perfect your technique.
Call to Action
Now that you’re equipped with the knowledge and techniques to create perfect grill marks, we invite you to put these tips to the test. Grill with confidence and creativity, and most importantly, share your success stories with us. We would love to see photos of your perfectly grilled dishes and hear about your experiences. Whether you’re a seasoned grill master or a novice exploring the joys of cooking with fire, your stories inspire us and your success is our reward.
So, fire up your grill, embrace the art of creating perfect grill marks, and let the world see your grilling prowess. Share your achievements, tips, and photos with our community, and let’s continue to inspire each other in our culinary adventures. Happy grilling!
Done with making perfect grill marks?


Pingback: Next Level Backyard - Grill, Chill, and Thrill - Next Level Backyard